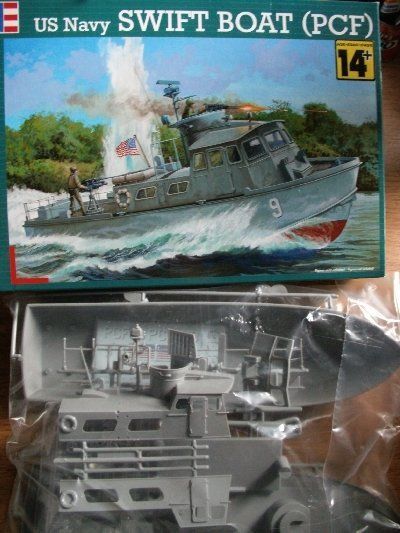
Well, Petty Officer Nguyen and I have finally finished the Swift Boat!
I think congratulations are in order for P.O. Nguyen, as he is now CPO Ngyuen. He was promoted last night upon the successful completion of this project.
His ‘Wetting Down’ will be held tonight… There will be no, Ba Muoi Ba 33, nuoc nam, kimchi or fish heads and rice… But instead, a few local beers will have to do… 
First I want to make one thing perfectly clear…
This is not Senator Kerry’s (then LTJG John Kerry) boat!
I give him all the respect I would give any Vietnam veteran, and fellow sailor, and thank him for his service, and this has nothing to do with all the news, stories and stuff said about him after the war. I just don’t personally like the guy. I don’t want this to turn into a political argument; it’s just how I feel…
Yes, he was OiC of this boat from1/30/69 to 3/69, but I’ve built this boat for later, after his deployment.
Ok, now that that’s out of the way…
![[linked image]](http://i271.photobucket.com/albums/jj146/shogun66/100_1416_zpsa29f1ydd.jpg)
While doing the research for this boat, I found, like many of its sister boats, she saw a lot of action. If you want to check out some of her after action reports, you can look here;http://swiftboats.net/ It’s a great site.
Operation Market Time was the United States Navy’s effort to stop troops and supplies from flowing by sea from North Vietnam to South Vietnam during the Vietnam War.
Some one asked me how much could be seen inside… Well, the shadows and flash make it difficult to see, but under normal lighting, and with the human eye, almost all of the work I did can be seen. To me, that makes it all worth it… A new anchor was scratched, as well as new anchor lines.
![[linked image]](http://i271.photobucket.com/albums/jj146/shogun66/100_1417_zps0om9kmr3.jpg)
I previously pointer out that all the weapons had to be replaced. I used 2 Hobby Boss .50 cals, some PE ammo belts, and some more plastic stock to rebuild the gun tub weapons.
![[linked image]](http://i271.photobucket.com/albums/jj146/shogun66/100_1409_zps5qtez5tq.jpg)
![[linked image]](http://i271.photobucket.com/albums/jj146/shogun66/100_1420_zpswet1tv5g.jpg)
Yes, that is a Jolly Roger flying from one of the antenna… I thought it made a nice touch, as some of the pictures I’ve seen have the boats crew flying them… The American flag is the kit decal, carefully glued to some thread. The boat hook was made the same as the broom/swab. I chucked a tooth pick into my Dremel tool, and spun it down to scale with a little sand paper.
![[linked image]](http://i271.photobucket.com/albums/jj146/shogun66/100_1421_zpsdcfv1uym.jpg)
I think the Chief (CPO Ngyuen) showed the aft armament being rebuilt last night…
![[linked image]](http://i271.photobucket.com/albums/jj146/shogun66/100_1422_zpsilzo4exz.jpg)
A few needed supplies were also added… Tamiya's stuff comes in handy here.
![[linked image]](http://i271.photobucket.com/albums/jj146/shogun66/100_1423_zpstfpu09cx.jpg)
Sacrificial anodes were scratch built, and added to the stern, below the water line. These helped control some of the corrosion to the hull…
![[linked image]](http://i271.photobucket.com/albums/jj146/shogun66/100_1424_zpsj2vpamwf.jpg)
More spare gear… The swab and broom are scratch built too…
![[linked image]](http://i271.photobucket.com/albums/jj146/shogun66/100_1425_zps22zefyiw.jpg)
If you look hard enough, I also added a few bilge drain outlets along the hull, as well as the sink drain from the galley. 
![[linked image]](http://i271.photobucket.com/albums/jj146/shogun66/100_1426_zps1x8oreiz.jpg)
Windshield wipers are made from staples, and thinly cut plastic stock...
![[linked image]](http://i271.photobucket.com/albums/jj146/shogun66/100_1427_zpssmdjwblq.jpg)
![[linked image]](http://i271.photobucket.com/albums/jj146/shogun66/100_1430_zpsghxekl1m.jpg)
All the lines are from various sizes of thread, and cord, all purchased at either Michael's, or Hobby Lobby. All the heavier lines are 'whipped' and all the knots are properly tied, including the tire bumpers
![[linked image]](http://i271.photobucket.com/albums/jj146/shogun66/100_1431_zpsjiqngqi6.jpg)
Our proud new Chief taking control at the Aft Steering Station. Prepare to be boarded!
![[linked image]](http://i271.photobucket.com/albums/jj146/shogun66/100_1432_zps1l8be93g.jpg)
All in all, this has been one of the more rewarding projects I've worked on. I don't know why, it just was...
The swift looks great sitting next to my Junk...
![[linked image]](http://i271.photobucket.com/albums/jj146/shogun66/100_1433_zpsl4iqw4pa.jpg)
I still have a few more Riverine projects planned, but for now, I think I need to build something fast and loud... Hey, isn't that a TV show or something?

![[linked image]](http://i271.photobucket.com/albums/jj146/shogun66/100_1306_zpsmbq90of8.jpg)
![[linked image]](http://i271.photobucket.com/albums/jj146/shogun66/100_1313_zpskotmwhh8.jpg)
![[linked image]](http://i271.photobucket.com/albums/jj146/shogun66/100_1315_zpsms8wppju.jpg)
![[linked image]](http://i271.photobucket.com/albums/jj146/shogun66/100_1316_zpsm4wyx1wt.jpg)
![[linked image]](http://i271.photobucket.com/albums/jj146/shogun66/100_1321_zps5mhatlti.jpg)
![[linked image]](http://i271.photobucket.com/albums/jj146/shogun66/100_1324_zpsstevixol.jpg)
![[linked image]](http://i271.photobucket.com/albums/jj146/shogun66/100_1328_zpswfenmqig.jpg)
![[linked image]](http://i271.photobucket.com/albums/jj146/shogun66/100_1326_zpsdabgdhx1.jpg)
![[linked image]](http://i271.photobucket.com/albums/jj146/shogun66/100_1329_zpssxprj34e.jpg)
![[linked image]](http://i271.photobucket.com/albums/jj146/shogun66/100_1330_zps97ofpysj.jpg)
![[linked image]](http://i271.photobucket.com/albums/jj146/shogun66/100_1335_zps90tbqmp5.jpg)
![[linked image]](http://i271.photobucket.com/albums/jj146/shogun66/100_1333_zpsfdfvotdl.jpg)
![[linked image]](http://i271.photobucket.com/albums/jj146/shogun66/100_1332_zps8hv74qxp.jpg)
![[linked image]](http://i271.photobucket.com/albums/jj146/shogun66/100_1342_zpszhydlggu.jpg)
![[linked image]](http://i271.photobucket.com/albums/jj146/shogun66/100_1341_zpsrsfch33h.jpg)
![[linked image]](http://i271.photobucket.com/albums/jj146/shogun66/100_1340_zpspyfpbzxv.jpg)
![[linked image]](http://i271.photobucket.com/albums/jj146/shogun66/100_1338_zpsgiumpu61.jpg)
![[linked image]](http://i271.photobucket.com/albums/jj146/shogun66/100_1344_zpshwpgronp.jpg)
![[linked image]](http://i271.photobucket.com/albums/jj146/shogun66/100_1345_zpsoxe3mufy.jpg)
![[linked image]](http://i271.photobucket.com/albums/jj146/shogun66/100_1353_zpsq4xpqpxx.jpg)
![[linked image]](http://i271.photobucket.com/albums/jj146/shogun66/100_1354_zpsirncrvjj.jpg)
![[linked image]](http://i271.photobucket.com/albums/jj146/shogun66/100_1346_zpsfxf6towr.jpg)
![[linked image]](http://i271.photobucket.com/albums/jj146/shogun66/100_1349_zpsoxmql5nw.jpg)
![[linked image]](http://i271.photobucket.com/albums/jj146/shogun66/100_1348_zpsvd9k4yw7.jpg)
![[linked image]](http://i271.photobucket.com/albums/jj146/shogun66/100_1347_zpskgui3fke.jpg)
![[linked image]](http://i271.photobucket.com/albums/jj146/shogun66/100_1351_zpsede27olx.jpg)
![[linked image]](http://i271.photobucket.com/albums/jj146/shogun66/100_1350_zpsjmbvrii4.jpg)
![[linked image]](http://i271.photobucket.com/albums/jj146/shogun66/PLTHS1_zps7olxvcbm.jpg)
![[linked image]](http://i271.photobucket.com/albums/jj146/shogun66/PLTHS3_zpsg1xkd8a6.jpg)
![[linked image]](http://i271.photobucket.com/albums/jj146/shogun66/PLTHS2_zpsnvnaugg1.jpg)
![[linked image]](http://i271.photobucket.com/albums/jj146/shogun66/PLTHS4_zpsvdj4y6cf.jpg)
![[linked image]](http://i271.photobucket.com/albums/jj146/shogun66/CBN1_zps01kg3qjt.jpg)
![[linked image]](http://i271.photobucket.com/albums/jj146/shogun66/CBN2_zpste7x9mkt.jpg)
![[linked image]](http://i271.photobucket.com/albums/jj146/shogun66/CBN3_zpsge9wqtor.jpg)
![[linked image]](http://i271.photobucket.com/albums/jj146/shogun66/100_1374_zpssy9qjerx.jpg)
![[linked image]](http://i271.photobucket.com/albums/jj146/shogun66/100_1375_zpsly9oopri.jpg)
![[linked image]](http://i271.photobucket.com/albums/jj146/shogun66/100_1376_zpsojpohvaf.jpg)
![[linked image]](http://i271.photobucket.com/albums/jj146/shogun66/100_1378_zpspk6zohkl.jpg)
![[linked image]](http://i271.photobucket.com/albums/jj146/shogun66/100_1379_zpsym0wiy3d.jpg)
![[linked image]](http://i271.photobucket.com/albums/jj146/shogun66/100_1380_zpskshfj1sq.jpg)
![[linked image]](http://i271.photobucket.com/albums/jj146/shogun66/100_1399_zps2jq6uwno.jpg)
![[linked image]](http://i271.photobucket.com/albums/jj146/shogun66/100_1391_zpsmr84pxil.jpg)
![[linked image]](http://i271.photobucket.com/albums/jj146/shogun66/100_1397_zpsli2vzlf1.jpg)